- Published on
Exporting for Steam Deck with Godot
- Authors

- Name
- Andrés Barreiro
- @drewler
This guide will help you export a Godot project to the Steam Deck for development purposes.
SteamOS Devkit Client
From the host computer (where Godot is installed):
- Install it from Steam by visiting this link (
steam://install/943760) - Search from SteamOS Devkit Client within Steam and open it
If you are using Linux and opening it doesn't work (and either you are using Wayland or you don't know what that is), try this:
python --version
# remember which version you have
# at the time of writing this, the linux client includes files for versions 3.9, 3.10 and 3.11
cd ~/.local/share/Steam/steamapps/common/SteamOSDevkitClient/linux-client
ls
# check the versions included and remember the one that matches your Python installation
# eg. if you have Python 3.11 you'll be using devkit-gui-cp311.pyz
SDL_VIDEODRIVER=wayland ./devkit-gui-cp311.pyz
If you want to keep tinkering, the Devkit Client is open source.
Pair Steam Deck to a devolpment host
First, make sure both the development host and the Steam Deck are connected to the same local network.
- From Steam Deck's menu go to
Settings => Developer(at the very bottom) - Click "Pair new host" (
Development Kit => Developmenthost pairing)
After a short delay (where among other stuff the client will create SSH keys for you), the Devkit Client in your host computer will update and show you additional buttons. From here you'll be able to perform multiple actions. One of them is switching between Steam's UI (gamescope compositor) and the Desktop UI. It should look like this:
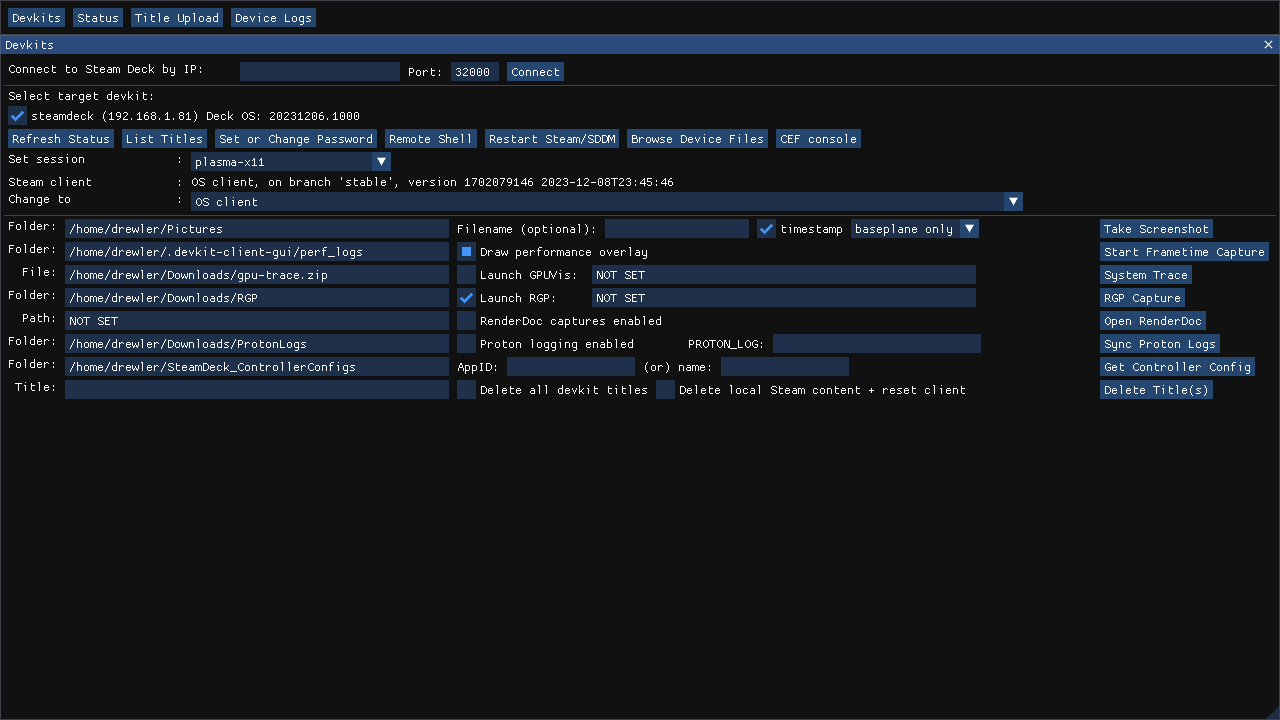
For the purposes of this guide we want to switch to the Desktop UI (plasma-x11). Don't wory, you'll be able to switch back and forth, either from the Devkit Client (selecting back gamescope), the Desktop UI itself (Return to Gaming Mode) or rebooting your Steam Deck.
So: select plasma-x11 from the Devkit Client in the host computer, usign the "Set session" dropdown.
Godot Exporter
You'll need Godot 4.1 at minimum. I'm using Godot 4.2.1 which is the latest stable version available at the time of writing this.
- Open your Godot project
- From the top menu, select
Project => Export
If this is the first time you are doing this, you'll probably see some message in red at the bottom about "No export template found at the expected path" at the bottom of the dialog.
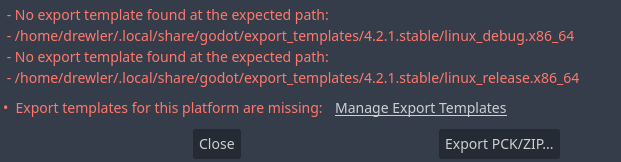
At the end of the message, there's a clickable line about "Manage Export Templates". Might be worth to change the mirror in the "Download from" selectable, from "Best available mirror" to "Official GitHub Releases mirror". and then "Download and Install".
Click "Add" on top of the "Presets" list and select Linux/X11. Now, on the right side.
- Give it a nicer name (eg. "Steam Deck")
- Click the "Runnable" toggle (so it's enabled)
- Scroll down to where it says "SSH Remote Deploy", click the checkbox next to "Enabled" (so it's active)
- Host:
deck@steamdeck.local - Post:
22
If you are using a Windows host
- Extra Args SSH:
-i "C:\Users\<yourusername>\AppData\Local\steamos-devkit\steamos-devkit\devkit_rsa" -o StrictHostKeyChecking=no -o IdentitiesOnly=yes -t - Extra Args SCP:
-i "C:\Users\<yourusername>\AppData\Local\steamos-devkit\steamos-devkit\devkit_rsa" -o StrictHostKeyChecking=no
You'll have to replace <yourusername>. If your SSH key is not in the default location, you'll need to specify the path to it in both fields.
By default it is in that subdirectory within your user's %LOCALAPPDATA% directory.
If you are using a Linux host
- Extra Args SSH:
-i ~/.config/steamos-devkit/devkit_rsa -o StrictHostKeyChecking=no -o IdentitiesOnly=yes -t - Extra Args SCP:
-i ~/.config/steamos-devkit/devkit_rsa -o StrictHostKeyChecking=no
If your SSH key is not in the default location, you'll need to specify the path to it in both fields.
By default it is in that subdirectory within your user's $HOME/.config directory.
Common to any host
Replace the contents of the "Run Script" input with:
#!/usr/bin/env bash
export DISPLAY=:0
xhost +
unzip -o -q "{temp_dir}/{archive_name}" -d "{temp_dir}"
"{temp_dir}/{exe_name}" {cmd_args} -f
(This troubleshooting comment helped me coming up with this script)
Replace the contents of the "Cleanup Script" input with:
#!/usr/bin/env bash
kill $(pgrep -x -f "{temp_dir}/{exe_name} {cmd_args}")
rm -rf "{temp_dir}"
That's all! You can close this dialog now.
Remote Debug
If you are developing, you probably want to set remote breakpoints, etc. To enable those:
- Open
Debugin the top menu - Enable
Deploy with Remote Debug
Export and test your project
Everything is ready. You can now click the "Remote Debug" icon on the top right (little "play" icon connected to a pipe under it). Make sure the Steam Deck is not suspended and in desktop (plasma-x11) mode.
Happy developing!